Building a Secure Custom VPC for a Scalable Web Application

Cloud Specialist with hands-on experience in Microsoft Azure, now transitioning into AWS. I’m focused on building, deploying, and optimizing cloud solutions while sharing my learning journey through real-world projects and documentation.
why this project mattered to me
At work (imagine a startup called NovaTech Systems), the web app’s logs had started filling the server disk. My task for the day: design a simple, secure network and expand storage so the app can keep running without interruption.
This was a hands-on, real-world task: create a custom VPC with public and private subnets, attach an Internet Gateway and route table so public servers can access the internet, launch an EC2 instance into the public subnet, and attach & mount an EBS volume for storing logs. Along the way I hit a few bumps — and that’s the best part of learning.
Below is exactly what I did, the commands I ran, the problems I hit, and how I solved them.
Architecture overview (what we built)
VPC:
NovaTech-VPC—10.0.0.0/16Subnets:
Public-Subnet—10.0.1.0/24(for web servers)Private-Subnet—10.0.2.0/24(for internal services / DB)
Internet Gateway:
NovaTech-IGW(attached to VPC)Route Tables:
Public-RT— routes0.0.0.0/0→NovaTech-IGWPrivate-RT— no internet route (internal-only)
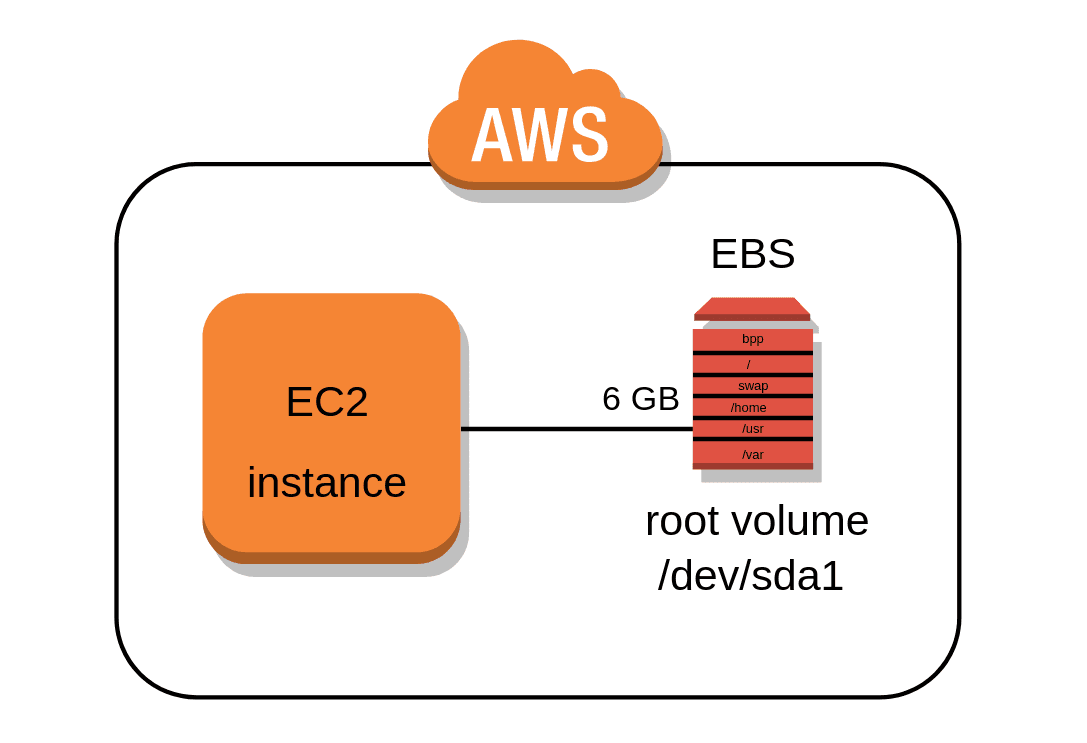
EC2 Instance: Amazon Linux 2 in
Public-SubnetEBS Volume: 8 GiB gp3 attached as
/dev/xvdf, mounted at/var/log/appdata
Step 1 — Create the VPC
Console → VPC → Your VPCs → Create VPC
Name:
NovaTech-VPCIPv4 CIDR:
10.0.0.0/16Tenancy: Default
Why: A custom VPC gives you control over IP addressing, subnets, and routing — like owning a small private network in the cloud.

Step 2 — Create subnets (public + private)
Subnets → Create Subnet
Public Subnet:
Public-Subnet→10.0.1.0/24→ AZ:ap-south-1aPrivate Subnet:
Private-Subnet→10.0.2.0/24→ AZ:ap-south-1a
Why: Public subnets host internet-facing resources; private subnets host internal services that shouldn’t be reachable from the public internet.
Step 3 — Create and attach an Internet Gateway (IGW)
Internet Gateways → Create Internet Gateway → name
NovaTech-IGWSelect IGW → Actions → Attach to VPC → choose
NovaTech-VPC
Why: The IGW is the VPC’s doorway to the internet. Without it, public instances can’t reach or be reached from the internet.
Challenge I saw: IGW didn’t appear in route table target dropdown until I attached it — remember to attach first.

Step 4 — Create route table for public subnet and add internet route
Route Tables → Create route table → name
Public-RT→ VPC:NovaTech-VPCSelect
Public-RT→ Routes → Edit routes → Add:Destination:
0.0.0.0/0Target:
NovaTech-IGW
Subnet associations → associate
Public-SubnetwithPublic-RT
Why: The 0.0.0.0/0 → IGW route sends non-local traffic to the internet via the IGW. Associating it with the public subnet makes instances there internet-routable.
Step 5 — Private route table (no internet)
Route Tables → Create route table → name
Private-RT→ VPC:NovaTech-VPCAssociate
Private-SubnetwithPrivate-RTLeave
Private-RTwithout0.0.0.0/0route (or you can add NAT Gateway later)
Why: Private subnets are isolated from direct internet access — best practice for databases or internal services.
Step 6 — Ensure Public Subnet auto-assigns public IPv4
Subnets → select Public-Subnet → Edit subnet settings
Enable Auto-assign public IPv4 address (or keep it as the subnet default)
Why: Instances launched here will automatically receive a public IP (so you can SSH or browse to them).
Troubleshoot note: If you don’t see an edit option, look in the Actions menu or open the subnet details pane — AWS console UI varies slightly.
Step 7 — Launch an EC2 instance into the public subnet
Steps in Console:
EC2 → Launch Instance
AMI: Amazon Linux 2 (free tier)
Instance type:
t2.microNetwork: select
NovaTech-VPCand Subnet:Public-SubnetAuto-assign Public IP: Enable
Configure security group: allow
SSH (22)from My IP and (optional)HTTP (80)from0.0.0.0/0Key pair: create or use existing
.pemand download it
Why: This instance is our test web server / admin instance in the public subnet.
Step 8 — Create and attach an EBS volume
EC2 → Elastic Block Store → Volumes → Create volume
- Size:
8 GiB, Type:gp3, AZ: same as the instance (very important)
- Size:
Select new volume → Actions → Attach volume → pick the EC2 instance → device
/dev/xvdf
Challenge I faced: At first my instance did not appear in the attach dropdown — reason: mismatched Availability Zone. Fix: recreate the volume in the same AZ as my instance or move the instance/volume to the same AZ.
Step 9 — SSH into the instance (from your laptop)
From Git Bash / terminal (example):
# go to folder where your key is stored
cd /c/Users/hp/OneDrive/Desktop/AWS

# make the key private (in Git Bash)
chmod 400 "SSH-KEY.pem"

# connect (Amazon Linux)
ssh -i "SSH-KEY.pem" ec2-user@<PUBLIC_IP>
If using PowerShell directly, skip chmod and use full path to key:
ssh -i "C:\Users\hp\OneDrive\Desktop\AWS\SSH-KEY.pem" ec2-user@<PUBLIC_IP>
Tip: Use the username ec2-user for Amazon Linux AMI.
Step 10 — On the instance: format and mount the EBS volume
Once connected, run these commands:
# show block devices
lsblk

# format the new volume (example device: /dev/xvdf)
sudo mkfs -t ext4 /dev/xvdf

# create a mount point for app logs
sudo mkdir -p /var/log/appdata

# mount the volume
sudo mount /dev/xvdf /var/log/appdata

# verify mount
df -h
You should see /dev/xvdf mounted at /var/log/appdata.
Step 11 — Make the mount persistent after reboot
# backup fstab
sudo cp /etc/fstab /etc/fstab.bak

# add entry to fstab (so the volume auto-mounts at boot)
echo '/dev/xvdf /var/log/appdata ext4 defaults,nofail 0 2' | sudo tee -a /etc/fstab
Why: Without an fstab entry, the mount would disappear after reboot. nofail avoids boot failure if the device is missing.
Step 12 — Quick functional tests
Inside the instance:
# confirm disk and mount
lsblk
df -h

# test network connectivity
ping -c 4 google.com

# check instance metadata for public IP (optional)
curl http://169.254.169.254/latest/meta-data/public-ipv4

If you installed a web server (optional test):
Amazon Linux example:
sudo yum update -y
sudo yum install -y httpd
echo "<h1>NovaTech Test Page $(hostname)</h1>" | sudo tee /var/www/html/index.html
sudo systemctl start httpd
sudo systemctl enable httpd
Then open http://<PUBLIC_IP>/ in your browser.
Problems I Hit & How I Fixed Them (the real learning)
Couldn’t attach volume: instance not listed
Cause: Volume was created in a different Availability Zone than the instance.
Fix: Recreate the volume in the same AZ as the instance, then attach.
Make public / S3 ACLs greyed out (from earlier S3 work)
Cause: Object Ownership set to bucket-owner-enforced and Block Public Access on.
Fix: For manual public test, enable ACLs (Object Ownership → ACLs enabled) and disable block public access — or use proper bucket policy. (Note: production should use CloudFront + signed URLs)
chmodnot found in PowerShellCause: PowerShell doesn’t have
chmod.Fix: Use Git Bash or provide full path and skip chmod in PowerShell. Use Linux-style commands in Git Bash.
Can’t stop the ping / terminal feels stuck
- Fix:
Ctrl + Cstops ping.exitlogs out of instance.Ctrl + Dalso ends an SSH session.
- Fix:
Route table deletion error when cleaning up
Cause: Route tables that are main for their VPC cannot be deleted.
Fix: Either delete the whole VPC (recommended for lab cleanup) or change the main route table association before deleting.
What this taught me (lessons for any Cloud Specialist)
AZ awareness is non-negotiable. Everything that attaches must be in the same Availability Zone.
Cloud networking is explicit. You must create routes and gateways — they don’t exist by default for custom networks.
Permissions & local environment matter. Simple things like
chmodor path differences on Windows vs. Git Bash can slow you down.Automation mindset. Making mounts persistent (
/etc/fstab), snapshotting volumes, and using IAM roles all help in turning a lab into production readiness.Document everything. I kept notes and commands (like the list above) — now they’re part of my portfolio.